 RageKit
How to replace textures in a YTD file
A .ytd is a GTA V texture dictionary: a set of DDS-style textures with their compression and mipmaps. To replace one, export it, edit the image and import it back in the same name. RageKit's RPF Explorer exports any .ytd to DDS and PNG, replaces a texture from a DDS or PNG, swaps a whole folder at once, and has a texture optimiser for textures that are too large or uncompressed.
Before you start
- The .ytd, in your game (copied to mods/) or in a mod's folder.
Steps
Open the .ytd
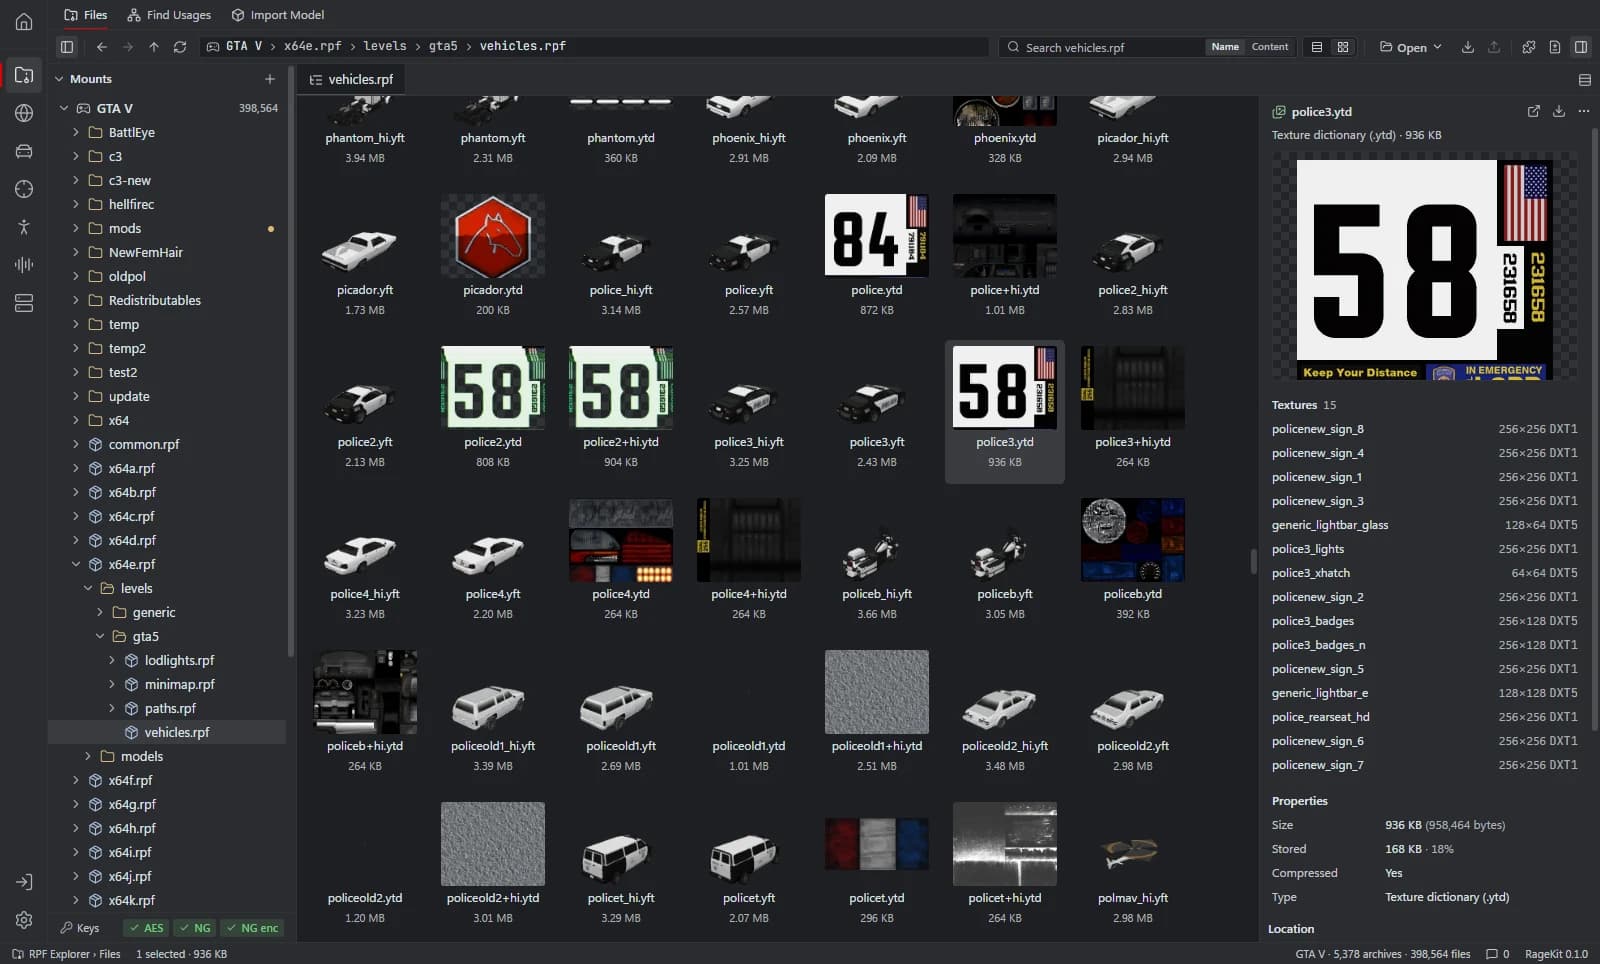
Find the file in the RPF Explorer and select it. On a game install, Copy to mods first.
Export
Choose Export… to get each texture as .dds and .png.
Edit the image
Edit it in any image editor and keep the same size if you can.
Replace
In the texture viewer choose Replace… and pick the .dds or .png.
Or replace many
Use Replace textures from folder… to swap every texture whose name matches a file.
Optimise
Run the texture optimiser to resize, compress (BC1, BC3, BC7 and more) and add mipmaps, with a dry run first.
Questions
Which compression should I use?
BC1 (DXT1) for textures without alpha, BC3 (DXT5) for alpha, BC5 for normal maps and BC7 for higher quality. The optimiser's Auto picks by alpha.
Why does my texture look wrong in game?
Common causes are a size that isn't a power of two, missing mipmaps, or the wrong compression. The optimiser flags NPOT, missing mips and uncompressed textures.
Tools in this guide
Related guides
- How to add a livery to a GTA V vehicleMake a UV template, paint your livery in any image editor with a live 3D preview, and write it into the vehicle's .ytd without a separate texture tool.
- How to install mods into the GTA V mods folderUse the mods folder so game files stay untouched: copy archives to mods, replace files, enable DLC packs in dlclist.xml and install OIV packages.
Get RageKit
Free for Windows 10 and 11. No account needed.
There's no Windows installer on the latest release yet. Check the changelog for when it lands.